A beginners guide to creating a github based blog. Part 2: Comments
The example blog (“sampleBlog”) created in the previous post provides no way for viewers of the posts to comment on the posts. This post will describe how to use a third party comment manager (disqus.com) to add comments to a jekyll blog.
To use disqus, first log in to disqus.com. You can use your google, facebook, or twitter account to log in to disqus.com or create a disqus account.
After logging in to disqus.com, choose “Add Disqus To Site” from the pull down menu in the upper right corner of the page as shown here:

The next page will prompt you for a “Site name” and “Disqus URL”. The “Site name” will appear on your blog above the comment entry window.

Choose these values and press “Finish Registration”. The next page will prompt you to choose a platform. Choose “Universal Code”.

A page showing setup instructions for universal code will appear. Create a new file, _includes/comments.html, and copy the html that appears into that file

At the top of the newly created _includes/comments.html, file, add the line “{% if page.comments %}” . At the bottom of the file, add the line “{% endif %}”
I got the technique of putting the comments javascript code into a separate file from this blog post by Joshua Lande. Thank you, Joshua Lande.
Add the following fragment to the file _layouts/default.html below the existing content div.
<div class="wrapper">
  {% include comments.html %}
</div>
After making these changes, adding “comments: True” to the front matter of any particular post will enable comments for that post. For example if you want to eenable comments for the “Welcome to Jekyll” post, , in the sample blog, modify the first few lines of the file, _posts/welcome-to-jekyll.markdown to appear as follows:
---
layout: post
title:  "Welcome to Jekyll!"
date:   2015-05-04 20:35:59
categories: jekyll update
comments: True
---
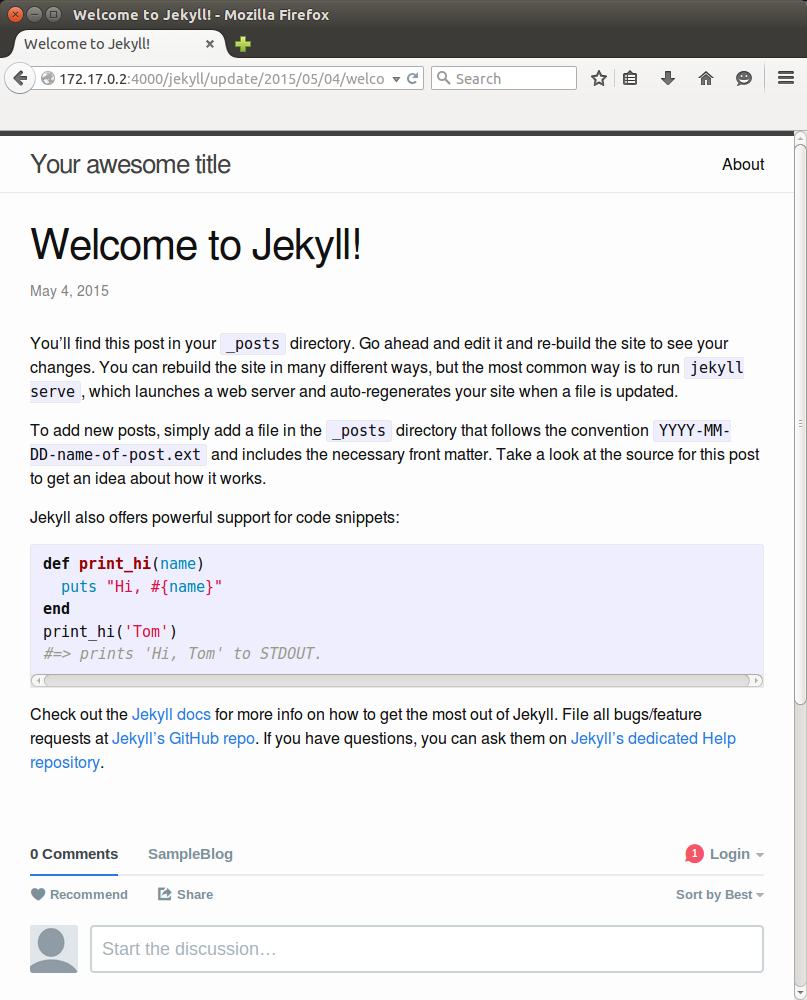
After making the above change, a comment section will appear at the bottom of the welcome post.

Copy the sampleBlog
As in the previous post, If you don’t want to go through the steps outlined above, the example, “sampleBlog”, is available to copy. The gh-pages branch will change as development of ths sample progresses but you can use the branch “gh-pages–added-disqus-comments” to copy just what has been done to this point. Once you do this, you will need to change the _config.yml file as shown in the previous and you will need to change the disqus discussion in the _comments.html file to a disqus comment set that you create.
The commands
Use the following commands to clone the example (“sampleBlog”) and create a gh-pages branch that reflects the changes made in this post.
git clone https://github.com/dc25/sampleBlog.git
cd sampleBlog/
git fetch origin gh-pages--added-disqus-comments
git checkout gh-pages--added-disqus-comments
git branch gh-pages
git checkout gh-pages
Once you have done this, you should be able to create a new github repository and push your local copy of sampleBlog to that repository. Once you push the gh-pages branch you should see the content published online.