A beginners guide to creating a github based blog. Part 1
This blog is hosted on github and created using the jekyll preprocessor. In this blog post I’m going to outline how to create a blog like this one. It took me a couple of iterations to get things right and I’m hoping to save others some of the trouble that I ran into.
In this post I try to err on the side of too much information. My goal is to cover details that might seem obvious to someone more experienced but were not obvious to me last week. I’m sure I also have glossed over some things - please let me know.
The process described here requires a github account so if you don’t have one, set one up now.
This blog post is the first of three and will cover the use of jekyll to create a blog and github to publish the blog. Later posts will cover adding the ability to comment on the blog and the use of bootstrap to format the blog.
All the work that I do here is done in a docker container that is running Ubuntu 14.04 . Using docker has several benefits:
- It isolates this work from my normal working environment.
- It gives me confidence that the process described here does not rely on tools that I had previously installed.
- If you are a Windows user you can install Docker and the process described here should still work.
Of course, if you are using Linux, you should be able to go through this process in a regular shell, without using Docker, if you choose.
Run Ubuntu inside of Docker
You should be able to install docker either on Linux or on Windows. After installing docker type :
sudo docker pull ubuntu:trusty
sudo docker run -t -i ubuntu /bin/bash
On windows you will not need the leading “sudo” in the above commands.
You should now see a docker command prompt.
Install the necessary software.
Most of what you need is available from apt-get
apt-get update
apt-get upgrade
apt-get install -y make ruby2.0 ruby2.0-dev g++ git nodejs-legacy npm python
Unfortunately, in addition to ruby2.0, an older version of ruby is installed and becomes the default. To fix this, run these commands:
rm /usr/bin/ruby /usr/bin/gem /usr/bin/irb /usr/bin/rdoc /usr/bin/erb
ln -s /usr/bin/ruby2.0 /usr/bin/ruby
ln -s /usr/bin/gem2.0 /usr/bin/gem
ln -s /usr/bin/irb2.0 /usr/bin/irb
ln -s /usr/bin/rdoc2.0 /usr/bin/rdoc
ln -s /usr/bin/erb2.0 /usr/bin/erb
gem update --system
gem pristine --all
Thanks to Victor Costan who suggested these commands in this blog post.
Use gem to get jekyll and bundler:
gem install jekyll
gem install bundler
Set up git
First, add the appropriate global config:
git config --global user.email "you@you.com"
git config --global user.name "Your Name"
Next, create a public private key pair:
ssh-keygen
Use copy and paste to add the public key to your github collection of keys .
cat $HOME/.ssh/id_rsa.pub
(Log in to github.com, go to “settings/SSH keys” and add the contents of id_rsa.pub as one of your SSH keys.)
Use jekyll to set up your blog
I did my work in a directory called /repos :
cd /
mkdir repos
cd repos
jekyll new sampleBlog
cd sampleBlog
In the sample directory create a Gemfile with the content suggested in the jekyll documents.`
cat > Gemfile << EOF
source 'https://rubygems.org'

require 'json'
require 'open-uri'
versions = JSON.parse(open('https://pages.github.com/versions.json').read)

gem 'github-pages', versions['github-pages']
EOF
Then run “bundle install” to get the remainder of tools that you need for this installation.
bundle install
Use your browser to view a local copy of the blog.
At this point you should be able to view your blog. First, use ifconfig to identify an ip address that the web page will be served at:
root@26f39a1a31ba:/repos/sampleBlog# ifconfig -a
eth0      Link encap:Ethernet  HWaddr fe:86:9e:8a:71:f4
          inet addr:172.17.0.51  Bcast:0.0.0.0  Mask:255.255.0.0
          inet6 addr: fe80::fc86:9eff:fe8a:71f4/64 Scope:Link
          UP BROADCAST RUNNING  MTU:1500  Metric:1
          RX packets:54031 errors:0 dropped:2 overruns:0 frame:0
          TX packets:28455 errors:0 dropped:0 overruns:0 carrier:0
          collisions:0 txqueuelen:1000
          RX bytes:75917347 (75.9 MB)  TX bytes:2352060 (2.3 MB)
In this case, for example, the ip address of interest isbundle to run jekyll to 172.17.0.51 . Knowing this, you can use serve the web page as follows:
root@26f39a1a31ba:/repos/sampleBlog# bundle exec jekyll serve -H 0.0.0.0 --baseurl ""
Configuration file: /repos/sampleBlog/_config.yml
            Source: /repos/sampleBlog
       Destination: /repos/sampleBlog/_site
      Generating...
                    done.
 Auto-regeneration: enabled for '/repos/sampleBlog'
Configuration file: /repos/sampleBlog/_config.yml
    Server address: http://0.0.0.0:4000/
  Server running... press ctrl-c to stop.
And now see it in your browser under the address http://172.17.0.51:4000 ( after changing the ip value to reflect the output from the ifconfig command above ).
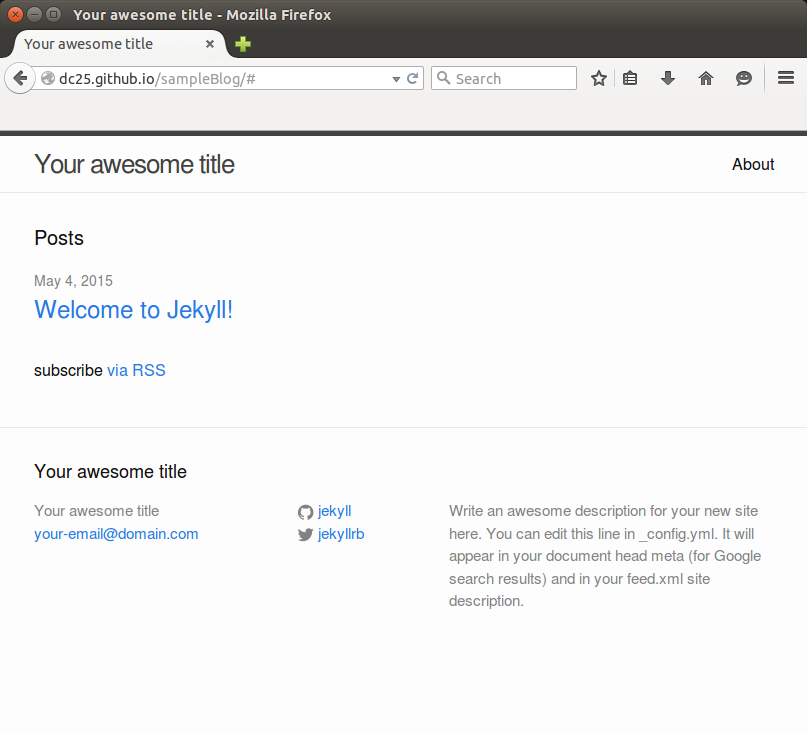
You should see something like this in your browser:
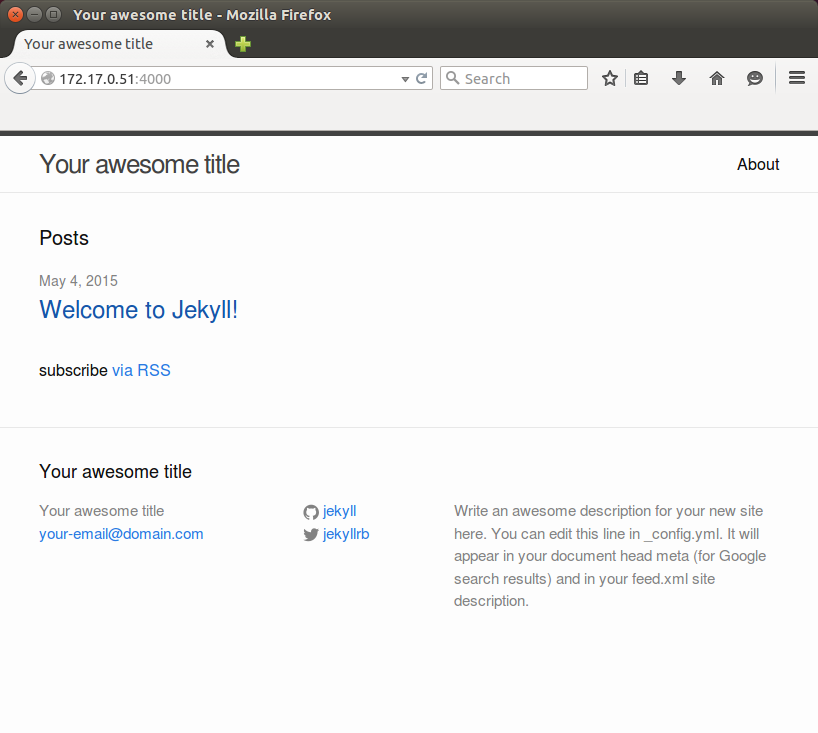
So far the content is generic but that will be easy to change later on.
Publish to github.com
Now, in your local directory ( /repos/sampleBlog in my case) initialize a local git repository and check in the blog as it stands. Use “git init”, “git add .”, and “git commit -m
root@26f39a1a31ba:/repos/sampleBlog# git init
Initialized empty Git repository in /repos/sampleBlog/.git/

root@26f39a1a31ba:/repos/sampleBlog# git add .

root@26f39a1a31ba:/repos/sampleBlog# git commit -m 'as created by jekyll'
[master (root-commit) 3511a9f] as created by jekyll
 18 files changed, 941 insertions(+)
 create mode 100644 .gitignore
 create mode 100644 Gemfile
 create mode 100644 Gemfile.lock
 create mode 100644 _config.yml
 create mode 100644 _includes/footer.html
 create mode 100644 _includes/head.html
 create mode 100644 _includes/header.html
 create mode 100644 _layouts/default.html
 create mode 100644 _layouts/page.html
 create mode 100644 _layouts/post.html
 create mode 100644 _posts/2015-05-04-welcome-to-jekyll.markdown
 create mode 100644 _sass/_base.scss
 create mode 100644 _sass/_layout.scss
 create mode 100644 _sass/_syntax-highlighting.scss
 create mode 100644 about.md
 create mode 100755 css/main.scss
 create mode 100644 feed.xml
 create mode 100644 index.html
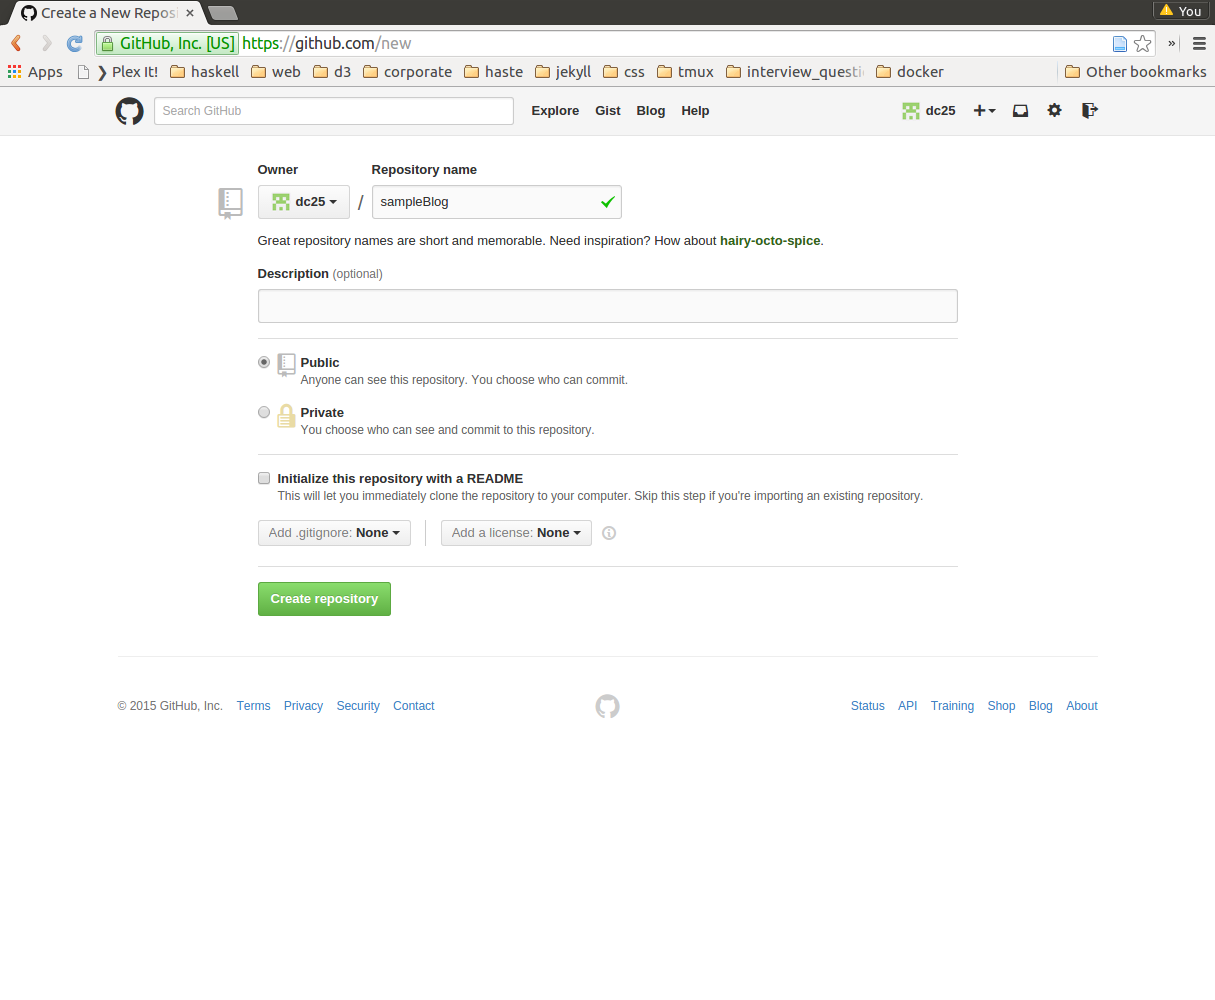
At this point you should be able to add the content to github.com . Log in to github.com and create a new repository with the appropriate name.
Take note of the instructions provided for pushing your existing repository to github.
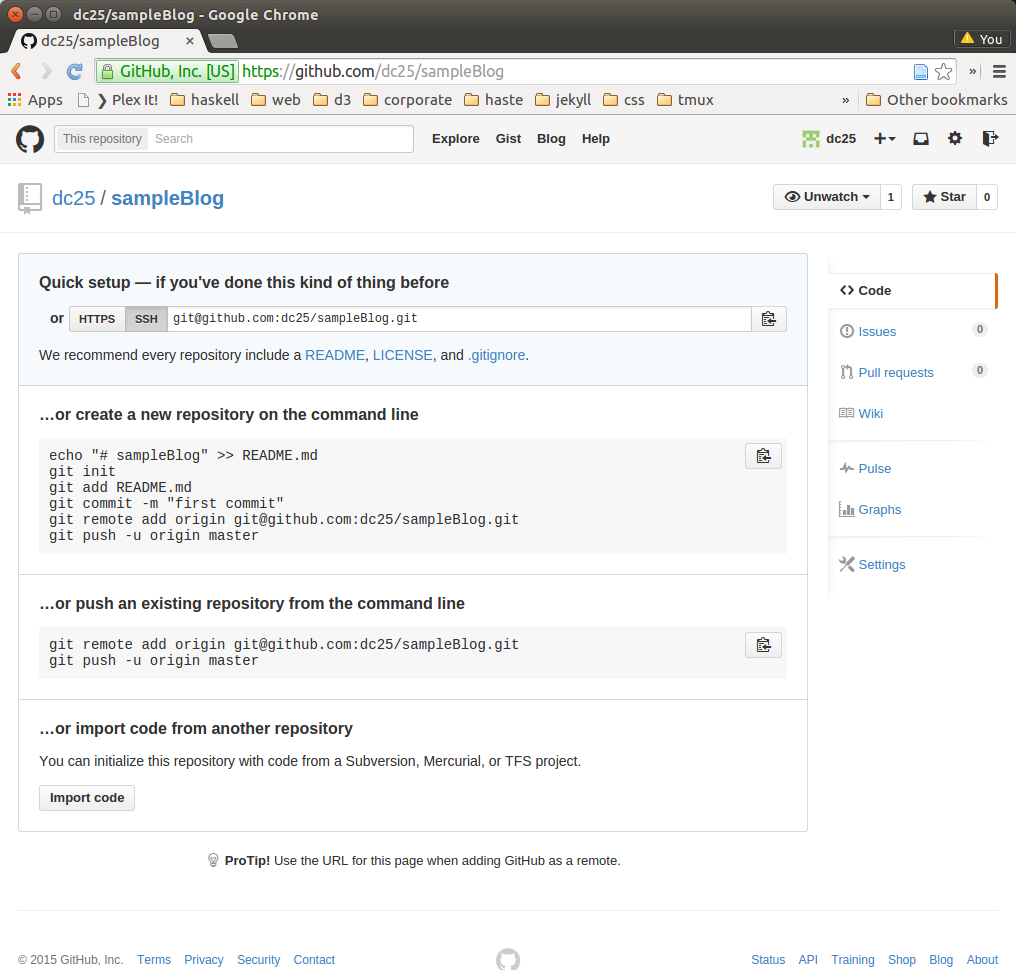
Now you can use the above instructions to push your blog to github. For this to work, you will need to have added your public ssh id to github earlier.
root@26f39a1a31ba:/repos/sampleBlog# git remote add origin git@github.com:dc25/sampleBlog.git
root@26f39a1a31ba:/repos/sampleBlog# git push -u origin master
The authenticity of host 'github.com (192.30.252.131)' can't be established.
RSA key fingerprint is 16:27:ac:a5:76:28:2d:36:63:1b:56:4d:eb:df:a6:48.
Are you sure you want to continue connecting (yes/no)? yes
Warning: Permanently added 'github.com,192.30.252.131' (RSA) to the list of known hosts.
Counting objects: 25, done.
Delta compression using up to 8 threads.
Compressing objects: 100% (23/23), done.
Writing objects: 100% (25/25), 9.73 KiB | 0 bytes/s, done.
Total 25 (delta 1), reused 0 (delta 0)
To git@github.com:dc25/sampleBlog.git
 * [new branch]      master -> master
Branch master set up to track remote branch master from origin.
root@26f39a1a31ba:/repos/sampleBlog#
For the blog to be displayed the content needs to be published on a branch called gh-pages. An easy way to make this happen is to create the gh-pages branch locally and push it to the github server.
root@26f39a1a31ba:/repos/sampleBlog# git checkout -b gh-pages
Switched to a new branch 'gh-pages'
root@26f39a1a31ba:/repos/sampleBlog# git push origin gh-pages
Warning: Permanently added the RSA host key for IP address '192.30.252.130' to the list of known hosts.
Total 0 (delta 0), reused 0 (delta 0)
To git@github.com:dc25/sampleBlog.git
 * [new branch]      gh-pages -> gh-pages
From here on all of your editing can be done in the gh-pages branch.
At this point you can see your published page but it will not look right.
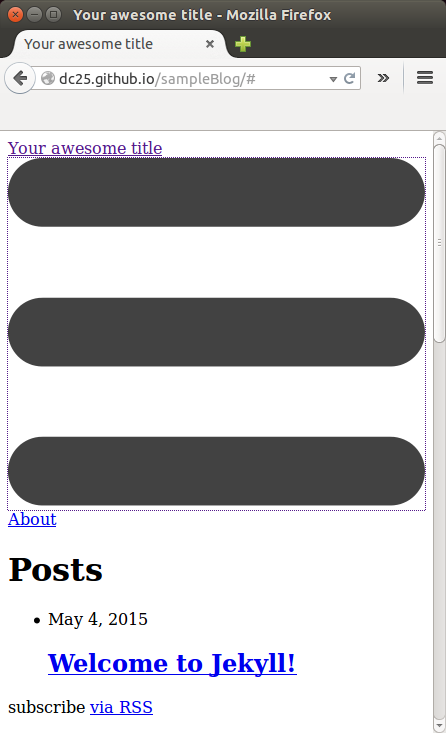
The three large horizontal black bars are actually the “hamburger” icon that sometimes appears in the upper right corner of the screen. The reason they are being scaled incorrectly is that the css files that describe how to render them are being looked for in the wrong place.
To fix this you will need to edit “_config.yml” . This file contains two variables, “url” and “baseurl”, that get combined to specify the prefix that is part of the absolute pathnames in the html for your site. Follow the example below to set “url” to “(your github id).github.io” and “baseurl” to “/(blog repository name)/”
_config.yml (unchanged):
# Site settings
title: Your awesome title
email: your-email@domain.com
description: > # this means to ignore newlines until "baseurl:"
  Write an awesome description for your new site here. You can edit this
  line in _config.yml. It will appear in your document head meta (for
  Google search results) and in your feed.xml site description.
baseurl: "" # the subpath of your site, e.g. /blog/
url: "http://yourdomain.com" # the base hostname & protocol for your site
twitter_username: jekyllrb
github_username:  jekyll

# Build settings
markdown: kramdown
_config.yml with url set for my github id (dc25) and baseurl set for this blog (sampleBlog)
# Site settings
title: Your awesome title
email: your-email@domain.com
description: > # this means to ignore newlines until "baseurl:"
  Write an awesome description for your new site here. You can edit this
  line in _config.yml. It will appear in your document head meta (for
  Google search results) and in your feed.xml site description.
baseurl: "" # the subpath of your site, e.g. /blog/
url: "http://yourdomain.com" # the base hostname & protocol for your site
twitter_username: jekyllrb
github_username:  jekyll

# Build settings
markdown: kramdown
Most of the other fields in this file will also need to be changed but those can wait until later. Changing these two variables is required now to get the site to render correctly.
Use the following commands to check in and push out these changes:
git diff
git add .
git commit -m 'fixed baseurl and url'
git push origin gh-pages
The result is shown in the transcript below.
root@e0fe9b843451:/repos/sampleBlog# git diff
diff --git a/_config.yml b/_config.yml
index 2f03e74..27ae743 100644
--- a/_config.yml
+++ b/_config.yml
@@ -5,8 +5,8 @@ description: > # this means to ignore newlines until "baseurl:"
   Write an awesome description for your new site here. You can edit this
   line in _config.yml. It will appear in your document head meta (for
   Google search results) and in your feed.xml site description.
-baseurl: "" # the subpath of your site, e.g. /blog/
-url: "http://yourdomain.com" # the base hostname & protocol for your site
+baseurl: "/sampleBlog" # the subpath of your site, e.g. /blog/
+url: "http://dc25.github.io" # the base hostname & protocol for your site
 twitter_username: jekyllrb
 github_username:  jekyll

root@e0fe9b843451:/repos/sampleBlog# git add .
root@e0fe9b843451:/repos/sampleBlog# git commit -m 'fixed baseurl and url'
[gh-pages 365b76f] fixed baseurl and url
 1 file changed, 2 insertions(+), 2 deletions(-)
root@e0fe9b843451:/repos/sampleBlog# git push origin gh-pages
Warning: Permanently added the RSA host key for IP address '192.30.252.129' to the list of known hosts.
Counting objects: 5, done.
Delta compression using up to 8 threads.
Compressing objects: 100% (3/3), done.
Writing objects: 100% (3/3), 328 bytes | 0 bytes/s, done.
Total 3 (delta 2), reused 0 (delta 0)
To git@github.com:dc25/sampleBlog.git
   3511a9f..365b76f  gh-pages -> gh-pages
root@e0fe9b843451:/repos/sampleBlog#
Once these changes are made the blog will be published and rendered correctly.
Customize the blog
As it stands the blog content is still just generic content created by jekyll.
There are several different aspects of the blog that can be easily personalized:
- Configuration ( _config.yml )
- Pages ( about.md for example )
- Posts ( _posts/*.markdown )
Configuration
Much of what you see on the front page is set in _config.yml. This includes
- The blog title
- The blog description
- Your e-mail
- Your github id
- Your twitter id
If you set these things appropriately you will have come a long way towards customizing your blog.
Pages
In the top level of your blog is a file called about.md . This is an example of a page. When your blog is rendered, links to all the pages appear on the bar at the top of the blog. Clicking on one of these links makes the page content appear on the front of the blog. To create more pages, copy about.md to another file with the same suffix (.md) and edit that file as needed. The new file will automatically appear on the top bar along with about.md
Posts
The default primary content on the main page of your blog is a post: “Welcome to Jekyll!!” . This content for this post is a stored in a lone .markdown file called “2015-05-04-welcome-to-jekyll.markdown” in the _posts directory of your repository. If you copy this file to an appropriately named file in the _posts directory that file will also appear as a post. Use the same date-based naming scheme for new posts that you create.
Copy the sampleBlog
If you don’t want to go through the steps outlined above, the example, “sampleBlog”, is available to copy. The gh-pages branch will change as development of ths sample progresses but you can use the branch “gh-pages–jekyll-new” to copy just what has been done to this point. Once you do this, you will need to change the _config.yml file as shown above but other than that, the blog should be usable.
The commands
Use the following commands to clone the example (“sampleBlog”)
git clone https://github.com/dc25/sampleBlog.git
cd sampleBlog/
git fetch origin gh-pages--jekyll-new
git checkout gh-pages--jekyll-new
git branch gh-pages
git checkout gh-pages
The output should look something like this:
(p1)dave@peach:/home/dave/repos/gitnc$ git clone https://github.com/dc25/sampleBlog.git
Cloning into 'sampleBlog'...
remote: Counting objects: 31, done.
remote: Compressing objects: 100% (26/26), done.
remote: Total 31 (delta 5), reused 29 (delta 3), pack-reused 0
Unpacking objects: 100% (31/31), done.
Checking connectivity... done.
(p1)dave@peach:/home/dave/repos/gitnc$ cd sampleBlog/
(p1)dave@peach:/home/dave/repos/gitnc/sampleBlog$ git fetch origin gh-pages--jekyll-new
From https://github.com/dc25/sampleBlog
 * branch            gh-pages--jekyll-new -> FETCH_HEAD
(p1)dave@peach:/home/dave/repos/gitnc/sampleBlog$ git checkout gh-pages--jekyll-new
Branch gh-pages--jekyll-new set up to track remote branch gh-pages--jekyll-new from origin.
Switched to a new branch 'gh-pages--jekyll-new'
(p1)dave@peach:/home/dave/repos/gitnc/sampleBlog$ git branch gh-pages
(p1)dave@peach:/home/dave/repos/gitnc/sampleBlog$ git checkout !$
git checkout gh-pages
Switched to branch 'gh-pages'
(p1)dave@peach:/home/dave/repos/gitnc/sampleBlog$
Once you have done this, you should be able to create a new github repository and push your local copy of sampleBlog to that repository. Once you push the gh-pages branch you should see the content published online.